How to create a newspaper with free Canva templates: a step-by-step guide
If you’re looking to create a newspaper using Canva, you’re in the right place. At Newspaper Club, we make it simple to design and print...
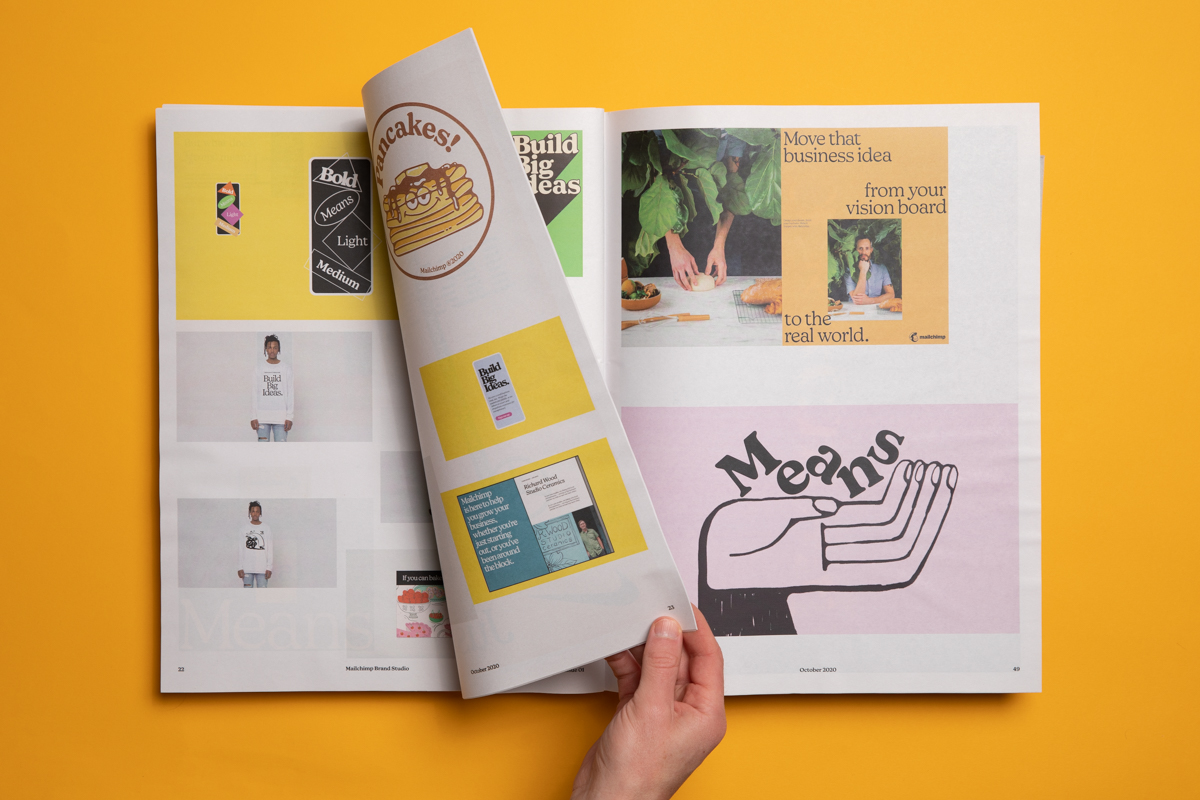
After you've taken some fabulous images of your newspaper following our photography guide, you can stitch them together and create a seamless animation flipping through your publication — like this:

Animations are a great way to bring your work to life and show a quick overview of what's inside without needing to record a video. You can add them to your website or online portfolio, share them on social media or pop them into an email newsletter.
Below, we'll walk you through the 8 steps to turn a series of still shots into a moving masterpiece.
Note: These instructions are for Adobe Photoshop, but the steps should be similar for other design software, including free alternatives like GIMP.
How to create an animated GIF of your publication
1. Create a new folder and move the photos you want to animate into it. Name the images in the order you want them to appear in the animation — for example, Animation-1.jpg, Animation-2.jpg, etc. Here, we're making a short animation using 3 images.
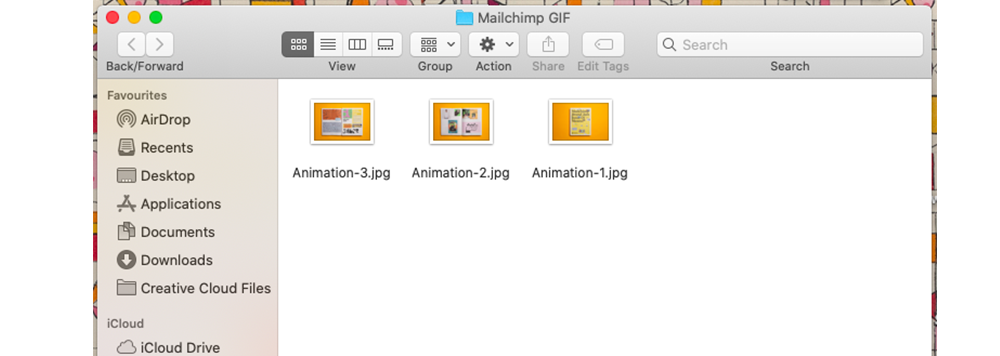
You can use as many images as you want, but remember that more frames = bigger file size and your animation will be slower to load. Some sites won't let you upload files over a certain size — Twitter, for example, has a maximum GIF size of 15 MB — so keep this in mind when creating your GIF.
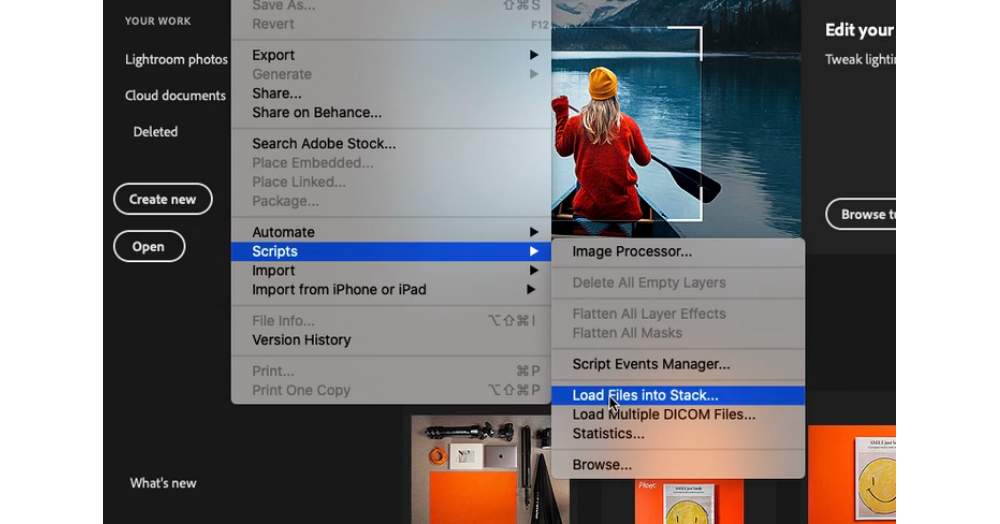
2. In Photoshop (or the editing software you're using), open the files by navigating to File > Scripts > Load Files into Stack. Click 'Browse' and select all the images you want to include in the animation. Click 'Open'.
3. After the files load into the document, navigate to Window > Timeline. This will open a timeline at the bottom of your window that looks like this:
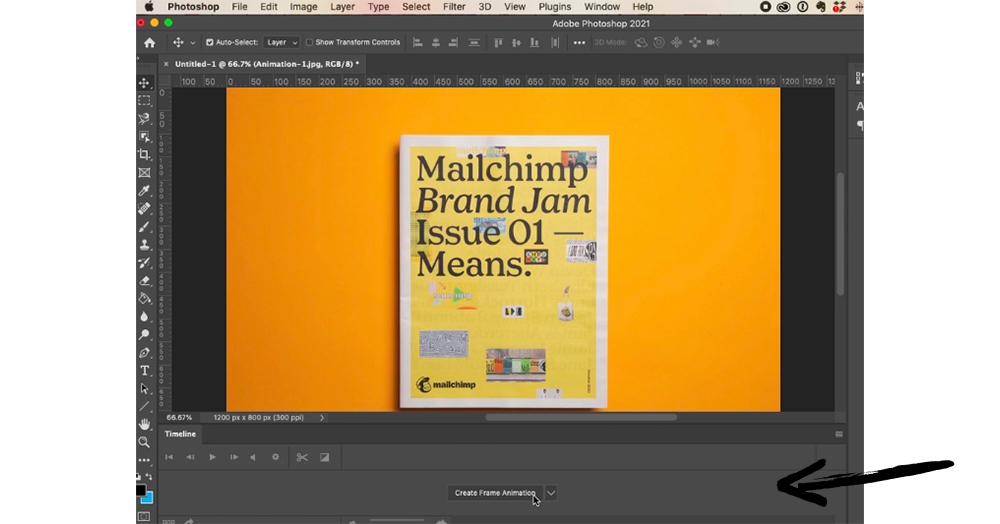
Click the button in the centre that reads 'Create Frame Animation.' (If the button in the centre reads 'Create Video Timeline', click the arrow next to it and swap it to 'Create Frame Animation').
4. At the top right of the timeline box, you should see an icon with 4 white lines: ![]() Click that and select 'Make Frames From Layers' from the menu.
Click that and select 'Make Frames From Layers' from the menu.
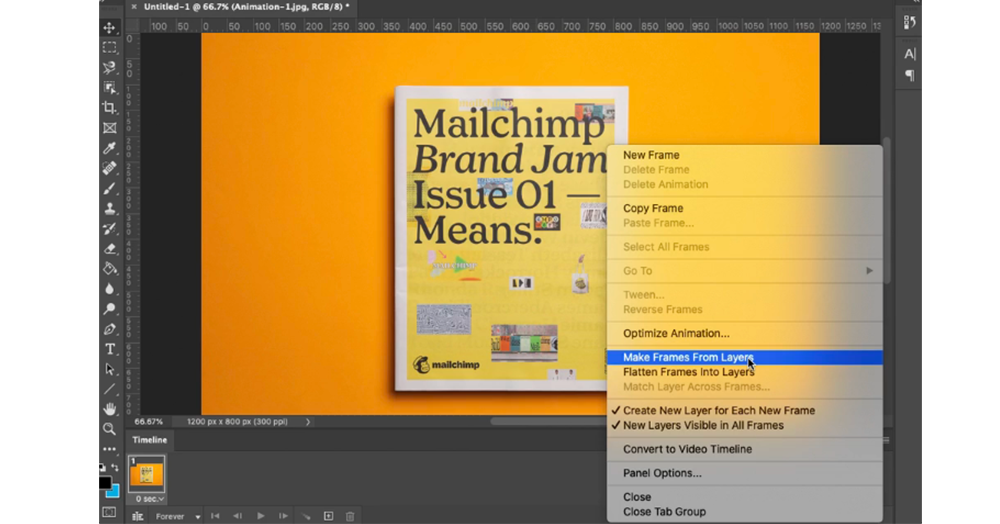
5. You should now see all of the images you want in your animation in your timeline. If they've loaded in the opposite order, selected them all (hold shift and click each one) and select 'Reverse Frames' from the same menu mentioned above.
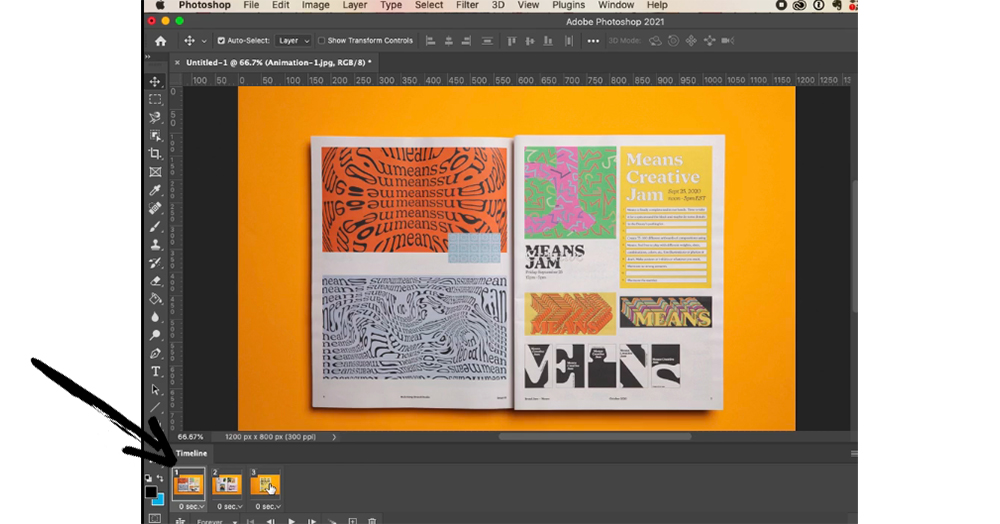
6. Select the speed for each frame. With the images all still selected, adjust the time underneath one image — this will adjust the time on all of them.
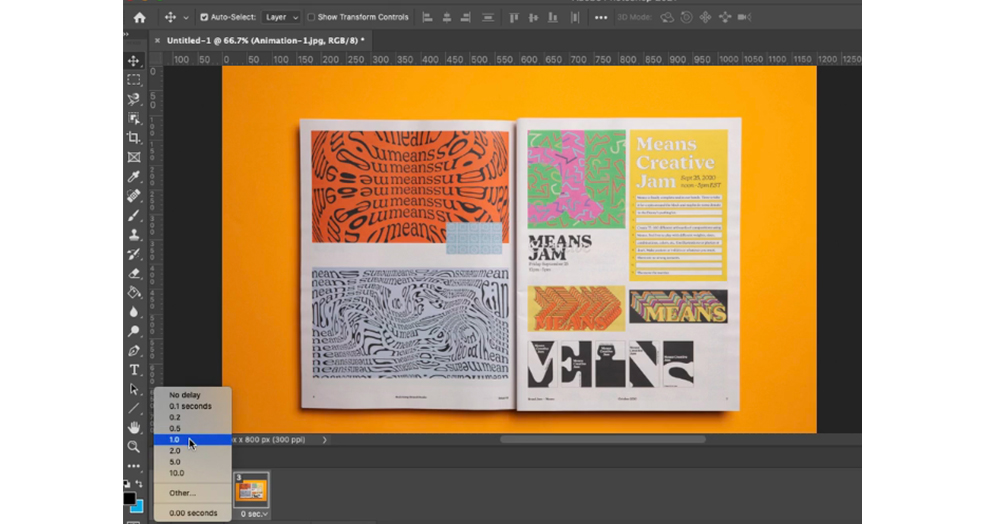
In the example at the top of this post, there's a 1 second delay between frames.
7. To keep your animation going on an endless loop, select 'Forever' from the menu below your images. (You can also choose Once, 3 Times or a custom number of times.)
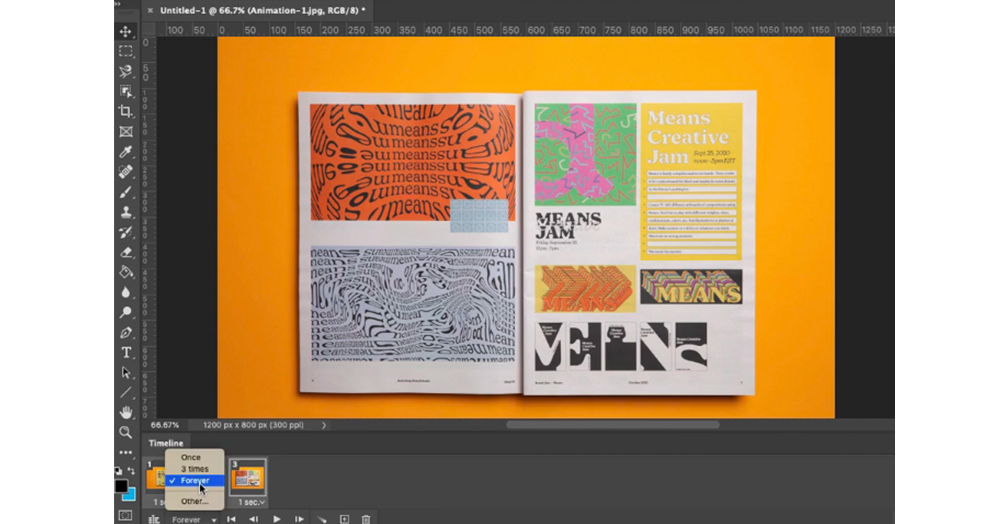
Preview your animation by pressing the play button to make sure it all looks right.
8. You're done! Just export the file as a GIF — in my version of Photoshop, this is done by navigating to File > Export > Save For Web (Legacy). Change 'Preset' at the top to 'GIF 128 Dithered'.
Here's a video showing the steps above in action:
Further resources
To turn frames of a video into a GIF: Social media gurus Hootsuite have a handy guide if you're starting with a video rather than still shots (jump to section 1B. Starting with video: Load your video file into Photoshop).
To share your GIF on Instagram: You'll need to convert it to .mov format. You can use the online tool Cloud Convert to do this.
Make your own newspaper with Newspaper Club. Print runs start at 1 copy!
If you’re looking to create a newspaper using Canva, you’re in the right place. At Newspaper Club, we make it simple to design and print...
Weddings are full of stories – how you got engaged, why you chose your venue or the flowers in your bouquet and all the little decisions...
So much thought goes into every part of your wedding, from the venue to the playlist to the colour of the napkins. But there’s only so...